Homework
assignments and Project Information for EE 421 Digital Electronics and
ECG 621 Digital Integrated
Circuit Design, Fall 2014
- Homework guidelines
are found here.
- Note that an A in
front of the problem
indicates an additional problem
from the book’s webpage, not a
problem from the book’s
end–of–chapter problems.
- All simulations, schematics, and layouts should be done using Cadence. Using other tools will result in zero credit.
- Follow the instructions for running an Xterm found here (video)
HW#20 – design and simulate, using the C5 process, the operation of a buffer
that can take a signal from a 12u/6u (= Wp/Wn) inverter and drive a 30
pF load, A11.11, and A12.1, due Wednesday, Nov. 26
HW#19 – A11.2, A11.4, and A11.5, due Monday, Nov. 24
HW#18 – A11.1 and A11.3, due Wednesday, Nov. 12
HW#17 – A10.1, A10.3, A10.5, A10.7, and A10.9 due, Wednesday, Nov. 5
HW#16 – Layout the bandgap reference used in the project discussed
below. Make sure your layout DRCs and LVSs without errors. Email your
zipped up proj_rjb (last two or three letters are your initials)
directory to the course TA for grading before the beginning of class on Wednesday, Oct. 29.
HW#15 – A6.9, A6.11, and A6.13 due Monday, Oct. 27
HW#14 – A6.5, A6.14, A6.20, and using Cadence generate the CV plots, Fig.
6.4, for W = L = 9u NMOS (S/D/B grounded) and PMOS (S/D/B connected to
vdd!, that is, + 5V) transistors in the C5 process, due Wednesday, Oct
22.
HW#13 – A6.4, A6.6, and lay out, using the C5 process, a 1.5 mm x 1.5 mm padframe for fabricating a MOSIS tiny chip (see Tutorial 6 here
for help). Your bare pads should use both metal3 and metal2, and via2s
connecting the metals together (you did this layout already in HW#6), and have both schematic views and
symbol views. Ensure the final layout is larger than 1.4 mm square but
smaller than 1.5 mm square. Show that your padframe DRCs
without errors, due Monday, October, 20.
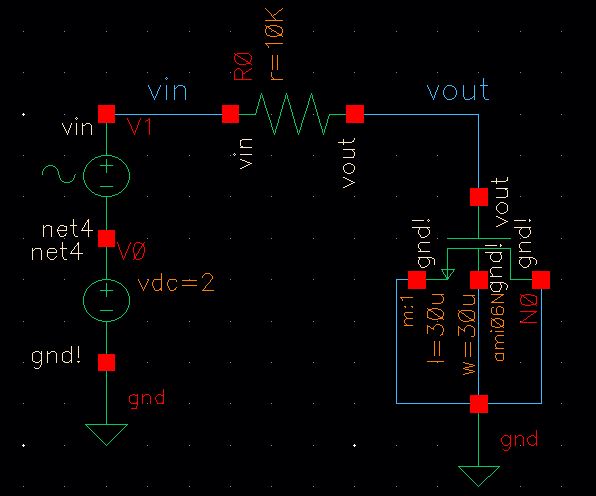
HW#12 – A6.2, calculate, and verify with simulations, the frequency when
the AC output voltage is half of the AC input voltage (assume the AC input voltage is 1 mV peak) in this circuit, due Monday, October 13
HW#11 – A5.10 and lay out a 1 pF poly–poly capacitor in the C5 process
(extract the layout to show the capacitor is nominally 1 pF), due
Wednesday, October 8
HW#10 – A5.1, A5.4, and lay out a 50k resistor
using hi–res poly2 in the C5 process (extract the layout to show the
resistor is nominally 50k), due Monday, October 6
HW#9 – A4.3–A4.6 (use the C5 process for A4.6 and 6u/0.6u MOSFETs), due October 1
HW#8 – A4.1–A4.2 and lay out, in the C5 process, a 1k resistor using undoped
poly2 (turn in the layout and extracted views of the resistor), due
Monday, September 29
HW#7 – A3.4–A3.6 and lay out, in the C5 process, test structures (2) for
measuring the plate and fringe capacitance between metal 1 and metal 2.
Comment on your layout choices, due Wednesday, September 24
HW#6 – A3.1–A3.3 and lay out a 40 pad padframe for a chip measuring 1.5 mm x
1.5 mm using the C5 process. Your pads should be made using Metals 3
and 2 connected together using Via2s. The pads should be 75 um x 75 um.
Comment on your design choices, due Monday, September 22
HW#5 – A2.2–2.5 (do not DRC since we only have the rules from the C5 process where lambda = 300 nm), due Wednesday, September 17
HW#4 – A2.6–A2.8, due Monday, September 15
HW#3 – A1.1–A1.5 (again, use Cadence. Using other tools will result in zero
credit) and A2.11, due Wednesday, September 10
HW#2 – Using Cadence draft the schematic and symbol of a 10k resistive
divider using n–well resistors in the C5 process as discussed in Tutorial 1, due Wednesday, September 3
HW#1 – Determine (using hand–calculations), and verify with simulations, the signals in Figs. 1.21, 1.22,
and 1.23 if 5 uF capacitors are used in place of 1 and 2 uF
capacitors, due Wednesday, August 27. Note that the point of
this
assignment is for you to review linear circuit analysis and to ensure
that you can follow the homework guidelines.
Course projects – Read
the policy on the course webpage concerning turning in late work. These
projects are NOT group efforts. What you turn in should be your own
work.
Your project report should detail:
- The reasons for the topology you selected including design considerations
- Hand calculations with comparisons to simulations
- A pin diagram for the design's layout (how to connect the layout to bond pads if we fabricate the design)
- Clear layout documentation (zoomed in and outlines of the layout for easy grading).
- Layout should be easy to understand (orderly and labeled). While tight layouts
are desirable it's more important to provide clear layouts.
- Email me your (*clean*) zipped–up design directory (that I can place in my CMOSedu directory) file and project report in PDF or Word formats.
- I should be able to figure out what to simulate and how to simulate it without any effort (make sure this is very clear!)
- I’ll perform an LVS and a DRC on what you send (so make sure everything is clean before emailing me!)
- I should receive the electronic report and zipped–up directory of your design via email (r.jacob.baker@unlv.edu) prior to the beginning of class (1 pm) on Monday December 1, 2014.
EE 421/ECG 621 project –
- In proj_f14.zip is a bandgap voltage reference schematic. A bandgap is
a common circuit used for generating a voltage reference of
approximately 1.25 V that doesn’t change [much] with temperature and
VDD variations. Before beginning the project lay out this bandgap as mentioned above in HW#16. Note that I’ve already laid out the parasitic pnp device (the diode).
- The second part of the project is to design a circuit that senses an input voltage (you should use the bandgap from
part 1 in this circuit). The output of the circuit is a logic 1 (vdd)
when the input is less than 12.5 V and a logic 0 (ground) when the
input is greater than 12.5 V. The circuit’s input should draw no more
than 10 uA of current and no less than 1 uA of
current. The sensing circuit you design should have a built in
hysteresis of at least 300 mV (but less than 600 mV). What this means,
for 300 mV hysteresis, is that the output of circuit may go high when
the input drops to 12.35 V and then low when the input goes beyond 12.65.
This is the same thing found in a thermostat controlling your home’s
heater. If you have your thermostat set at 70 degrees your heater may
kick on when the temperature drops to 69 and then shut off when the
house heats up to 71. This keeps the heater from cycling on and off.
Characterize your design for VDD ranging from 4 to 5 V and for
temperatures ranging from 0 to 100C. Note that your simulations should use a
symbol of your total circuit (what you’ve designed and the bandgap reference)
having 4 pins: vdd, gnd, Vin (the nominally 12.5 V signal), and Enable
out. If you use global vdd! and gnd! then a symbol with two pins, Vin
and Enable, is okay.
- Use
your design from part 2 to enable a ring oscillator that drives buffers
that drive a charge pump that supplies (nominally) 12.5 V with load
currents ranging from 0 to 100 uA (the
output of the charge pump is the input in part 2). Again characterize
your design for vdd ranging from 4 to 5 V and for temperatures
ranging from 0 to 100C. The final cell that I simulate should have vdd
and ground connections (or use global vdd! and gnd!) with a 12.5 V output voltage (in other
words your final design should have a symbol view). Note that in Spectre you can model the
load current with a current pulse. Show how robust your design is for
varying load currents (say a pulse from 0 to 100 uA or from 100 uA to
0 etc.) Some thought is required to demonstrate, via simulations, a
robust design. I would also like you to discuss the efficiency of the
design. Ideally all of the power supplied by vdd, vdd*AVG(I(vdd)), is equal
to the power delivered to the load, VLOAD*ILOAD (see page 4 here). In a real circuit this
won’t be the case since your circuit will dissipate power.
- This
efficiency calculation assumes that Vout, VDD, and Iload are DC values.
Make sure only steady-state (no start-up waveforms) are present in
I(VDD) when you use the calculator (see link below for help) to
calculate the average else your calculations will be incorrect.
For example, to ensure that no start-up waveforms are present in the
waveforms you may use .tran 50u 200u (a 200u simulation that starts
saving data at 50u, again an example).
- For students taking ECG 621 increase the maximum load current specification from 100 uA to 300 uA.
Return